Table of Contents

Disclaimer: Please note that some of the links below are affiliate links, meaning we will earn a commission if you purchase through those links (at no additional cost to you).
Get Started with Bluehost
![]() If you want to start a blog, the first trick for food bloggers is get your site hosted. We researched a number of hosting platforms and decided on Bluehost.
If you want to start a blog, the first trick for food bloggers is get your site hosted. We researched a number of hosting platforms and decided on Bluehost.
We chose this one because it is popular (they host over 2 million sites), has an easy-to-use interface, has very affordable prices compared to other hosting sites, and provides unlimited access to WordPress. In our article “How to Start a Food Blog”, we break down the setup process with Bluehost into a few straightforward steps.
Choose a Theme
 Now that you’ve chosen a hosting platform, an integral part of your food blog is deciding on the WordPress theme. Definitely make sure to do some diligent research because once you choose a theme, it is cumbersome to change to a different theme. We chose the Customizr theme because we had a vision of what the site should look like and wanted total control of the appearance.
This theme is easy to use, very responsive (which means your site seamlessly displays on other platforms like smart phones), and has extensive FAQs for implementing various functionality. You can also download the Nimble Builder plugin for an even easier interface when customizing this theme. But if not this theme, check out the thousands of other free themes out there!
Recommended WordPress Plugins
 Plugins can be either super helpful or ridiculously frustrating. We spent a lot of time trying to find free plugins that still serve their functions well. Most plugins out there have a free and a pro (paid) version and purposely underpower the free version to force you into buying the paid version. While some say that you need to invest in your blog in the hopes of future returns, with enough patience, you can find the right plugins for your blog without breaking your budget. Here are some of the plugins we decided on based on A LOT of trial & error:
- The Post Grid: a fully responsive and very customizable grid that displays featured pictures from your posts (we use this plugin for our Recipe Page)
- WP Recipe Maker: there are a lot of recipe plugins out there but this was the nicest *free* one we could find. With this plugin, adding recipes is crazy fast and simple.
- Yoast SEO: this plugin is a MUST for really any blog. Search Engine Optimization (the backend process of optimizing your site to increase visibility from search engines) is very complicated and this plugin does all the work for you so you don’t have to worry much about it.
- Shareaholic: a comprehensive plugin for all your social media needs for your site. Free and easy to use.
- Hustle: this is the plugin that powers the subscription popup you might have seen at the bottom of your screen.
- MetaSlider: this is how we set up the main photo slideshow box on our Home Page.
Food Photography
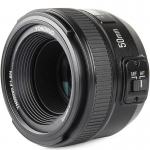
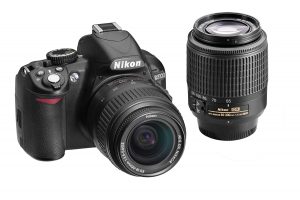
Taking high-quality photos of all your recipes is essential for several reasons. It makes users want to return to your site, it makes it easy to get accepted to food submission sites (see below), and it imparts a sense of professionalism to your brand. For our site, we were initially using Zoe’s Galaxy phone for photography. It took decent photos and was easy to transfer them to the website, but we eventually switched over to using my Nikon DSLR once Zoe got me a nice 50mm Lens for my birthday, we switched over and haven’t gone back. You can tell the difference in quality between photos taken in the pre-DSLR era (like our Rosemary & Garlic Focaccia) vs those taken with the DSLR (like our Cashew Chicken).
We have a few other photography tricks for food bloggers which we’ll discuss more thoroughly in a separate article (coming soon!)
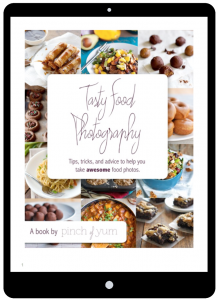 <-- In the meantime, check out Pinch of Yum's Food Photography EBook. This was a great resource for us when we were starting out. We learned a ton from it!
Photography Editing
Taking great photos is a first step but to take your photography to the next level and create stunning final products, we suggest you learn how to edit photos properly. By adjusting things like exposure, white balance, and lens corrections, you can make your recipes look as good on your site as they do in real life. We will cover photo-editing tricks for food bloggers in a separate future article (also coming soon!). Here are the programs we use:

- Adobe Lightroom: this is best for making the photography adjustments listed above
- Adobe Photoshop: this lets you add or subtract components to your photos (like when designing Pinterest pins)
Food Photo Submission Sites
Once you have your site up-and-running, you need to get your name out there and drive people to your site. One of the best ways of doing this is by submitting your spectacular photos to food photography submission sites. This can be cumbersome, but all-in-all well worth it. However, we’ve found that some are better than others. Here are a few of the submission sites out there:
- Foodgawker: known as the premier submission site, foodgawker is very selective with the photos they accept but consistently getting your photos accepted here drives a ton of traffic. Check out our foodgawker gallery for examples of photos they accept. Wait time for a decision is typically 3-8 days.
- Foodyub: while it isn’t as popular as foodgawker, this site still drives some decent traffic to your site, is less nitpicky with acceptance, and is by far the easiest/fastest site to submit photos. Check out our foodyub gallery here. Wait time is also around 3-8 days.
- Yum Goggle: submitting photos to this site is a bit intensive and it doesn’t let you sign-in to keep track of all your submissions. However, it still seems fairly popular so we still submit here when we have time. Waiting time is slightly longer than those listed above.
- Fridgg: this site doesn’t drive a ton of traffic, in part because the photography quality isn’t as high as the sites listed above since anyone can submit photos and they are automatically accepted. Wait time is none (they are immediately displayed).
- Sites we don’t use or stopped using are FoodPornDaily (they haven’t updated in years), Healthy Aperture (they are the only submission site we found that charges you for the ability to submit), and Taste Spotting (the wait time is several months).
Social Media
The relative popularity among social media platforms with respect to food blogs is always changing. It’s best to stay up-to-date with which ones people are still using and which are fading. Here are our thoughts on social media we’re using in 2019:
- Instagram: this seems to be the most popular platform for food photography. There are amazingly supportive food blogger communities out there and is a fun way to organize all your photos.
- Facebook: people don’t seem to be using Facebook much anymore for food photography. In our experience, posting links to our Facebook page doesn’t lead to many likes/comments but the people who do click on links tend to have low bounce rate (which is a good thing!)
- Pinterest: A lot of food bloggers still seem to love Pinterest. This might be because other bloggers pay for subscription services like Tailwind to automate the timing of their pins. We still use Pinterest, though not as often as we did initially.
(By the way, you can click the links above to check out our social media pages. Feel free to add us!)
Mailing Lists
 Mailing lists are a great way to create a community of dedicated users. You can use plugins like Hustle (discussed above) to let people opt-in to email lists. Even if your subscribers don’t always click the links in your email, it’s still a good reminder to them that your site still exists and is putting out quality material. We use Mailchimp to create and send our email campaigns and would highly recommend it.
Monetization
Once you have your site up-and-running, you’re consistently publishing new material, and you have a steady stream of traffic, you can start thinking about how to monetize your site. After all you have put a lot of work and effort into your food blog so you might as well at least break even or make some profit. Here are a few monetization tricks for food bloggers:
- E-Books: you can create E-books fairly easily by simply using Microsoft Powerpoint. You can then leverage these E-books to get users to subscribe to your mailing list or charge a small price for them. If you’d like an example, check out our E-Book, “Our Top 25 Recipes”. All you have to do to get it is subscribe 😉
- Affiliate Programs: we use the Amazon Associates Program but there are many others out there. The concept is that if other users are directed to their site via your link and end up buying their product, you get a proportion of their profit (for Amazon this is between 1-10%).
- Ads: this is one area we haven’t explored. Many food blogs get a small but steady source of income through displaying ads on their site. Some examples of ad programs are Google Adsense, BlogHer, and Mediavine. Some bloggers recommend waiting until you have a ton of users until you start adding them but others say to just go for it from the get-go. We’re leaning toward the former rather than latter but to be honest, we just need to some research into whether we would make enough profit from them based on our traffic to justify their annoying presence on our site.
- Sponsored posts: occasionally, a company will reach out to you and offer to pay you to publish a post using their product. These are great opportunities to simultaneously make money and produce content for your site.
- If you have other ideas for monetization or methods that have worked for you, feel free to post a comment below!
![]() For more tips and tricks for food bloggers on how to grow and monetize your blog, check out Food Blogger Pro by Lindsay and Bjork. Joining gives you access to 350+ food blog tutorials, a supportive community of other bloggers ready to answer your questions on forums, and exclusive discounts on food blog tools and services.
For more tips and tricks for food bloggers on how to grow and monetize your blog, check out Food Blogger Pro by Lindsay and Bjork. Joining gives you access to 350+ food blog tutorials, a supportive community of other bloggers ready to answer your questions on forums, and exclusive discounts on food blog tools and services.
Staying Motivated
Maintaining a blog requires a good balance of patience and persistence. Zoe and I started GradFood while she was in her PhD program and I was in med school (see our About Us page for details of our site’s origins). We didn’t have a ton of extra time on our hands but since we figured starting a blog would be a fun distraction for some of our free time. It definitely takes more work that we initially thought but we eventually learned to streamline workflow and prioritize high-yield techniques.
Building your user base requires posting frequent content, utilizing social media and other forms of advertising, and regularly researching ways to improve your site. They say most blogs end up being deserted and forgotten within a year, but that doesn’t mean you should give up hope! Building regular traffic takes time so set realistic goals and don’t expect immediate results. Just keep reminding yourself of the reasons you started your blog, find your own personal ways to stay motivated, and above all, KEEP HAVING FUN!
We hope you’ve enjoyed these tips and tricks for food bloggers. We’d love to hear what you think with a comment below and let us know what has worked well for your site if you’ve already started one. Anyways thanks for reading this whole article and Happy Blogging!!!
19 thoughts on “10 Tips & Tricks for Food Bloggers”
I was very pleased to find this site. I wanted to thank you for this great read!! I definitely enjoyed every little bit of it and I have you bookmarked to check out the new stuff you post.
Thanks so much, glad you enjoyed it!
The article is bright and clear, with no additional useless facts or else.
The language is both brilliant and vibrant, so the longer I read, the longer I do enjoy it!
Thanks for the feedback! We’ll do our best to keep publishing high quality articles!!
Thanks.
thank you for this informative blog
You’re quite welcome!
Thank you so much for sharing this food blog, I’m foodie…
You’re quite welcome! Glad this was helpful 🙂
thanks for sharing the information
No problem! Glad it was helpful 🙂
thank you for this informative blog
You’re quite welcome!
Wow, thank you for those tips and tricks! Food bloggers can definitely benefit from this.
Glad that you found it helpful!! Your restaurant looks great btw! We’ll have to check it out if we find ourselves in Florida!
I read your post. It is very informative and helpful to me. I admire the message valuable information you provided in your article.
Thanks, we appreciate your kind words!
Nice article.
Nice Post.